While working on a quilt it is nice to have a place where to place your blocks or quilt sections or even just fabrics you might use, to audition them, to see how they play together. Well, such a place is called a designer wall. I have several of them in my sewing office. As a matter of fact I have six of them on the wall and I also have two big ones in my longarm room. The best color to use, I have learned, is gray. Gray is just there, it does not get on the way, it does not stand out.
I bought a bolt of gray felt and some insulation boards. I covered the insulation boards with gray felt and the designer walls were born. Some of the boards are the kind that have aluminum coating which can be used to heat set crystals on a quilt among other things that require extended exposure to heat.
Insulation boards can be bought at a home improvement store. They usually are eight feet long by four feet wide. I had someone at the store cut them for me into two four by four boards because the big board wouldn’t fit in my car. Then I taped sections together and made designer walls of different lengths. I even made one 8′ x 8′ that we use to photograph big quilts.
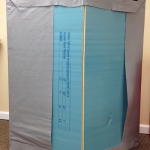
The insulation boards that I purchased are made from two layers of paper and insulation material in between these two layers. I cut through one layer of paper and the insulation material to be able to fold the boards and make transportation easier. This also allows me to stand the boards on a table or even the floor to display quilts when doing lectures for guilds.
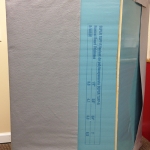
- Back side of designers wall
- Use small straight pins to hold felt onto board
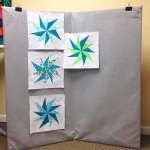
- Folded designers wall with blocks
Notice how in the last picture the board stands alone. You can also use it this way if you do not have a dedicated room for your sewing needs. Take the board out, place your blocks, fold it and store it away (maybe under a bed). Also, in the same picture, notice the big black binder clips, these are to hang the board from picture nails on the wall.
I use a lint roller to keep the designer walls clean.


